Before cutting up leather to make the crest structure, I will make a pattern. I chose to use felt, as it has only slight give and is easy to stitch.

I began by cutting a few pieces into manageable sizes with overlaps of at least an inch. The overlaps were trimmed down as I joined the pieces, so the excess fabric did not affect the pattern's ability to wrap. You can see the threads I used to tie the basic pieces onto the body first. I started to stitch from the nose back, using fairly long stitches in a contrast colour thread.


The ears were freed by cutting a split in the head pieces. These holes will be unnecessary in the leather model, as I plan to attach the ears to the outside of the head using separate pieces.
Once the rough cover was pulled together, I trimmed the seams further and went back to tighten up any loose or puckering areas.


Once all of the pieces fitted reasonably well, it was time to open the pattern pieces out. I wanted the finished item to be around the same size as the clay model. Since the felt pattern was made over the clay model, it was bigger than needed, and since plaster / gesso would be layered over the finished leather structure, the pattern pieces needed to create a smaller item than the felt cover. This was achieved by cutting on the stitch seams and not adding a seam allowance back in.


The black lines are placement markers to help put the pieces back together. I numbered the pieces and transferred the felt pattern onto heavy card. Each piece was labelled and is stored in a bag. To keep my patterns neat, I like to mark them with-
* The item name
* The owner's name
* The date of creation
* If there is a seam allowance (SA) or not. If so, how much on each side, as certain sides of a garment often get different SAs.
* Number of pieces
* Description of the pieces (CF= centre front etc)
* Any placement marks
* Indicate any folds ( v--------------v)


I was planning to sew the leather with butted joins, so no seam allowance would be needed. I was only looking to make a rough structure from leather, with all of the texture done in gesso grosso and all of the surface detail completed in gesso sotile.
In order to create a slightly smaller leather item, not exactly the same size, the pieces were trimmed a few millimetres in from the pattern pieces on the leather. I have chosen to try a piece of leather that is 2 - 3mm thick (slightly more pliable than belt leather). The pattern was inked on, as it should be covered by the gesso. The leather was also chosen because it is marked, making it less useful for other projects. I am hoping the water hardening and plaster layers will firm it up. I considered doing some tests but since structural integrity cannot be simply scaled up, doing tests on smaller pieces would not be truly indicative of the finished strength, and full size tests would be very costly. I still hope to do some striking tests with the plaster layer, at a later date.

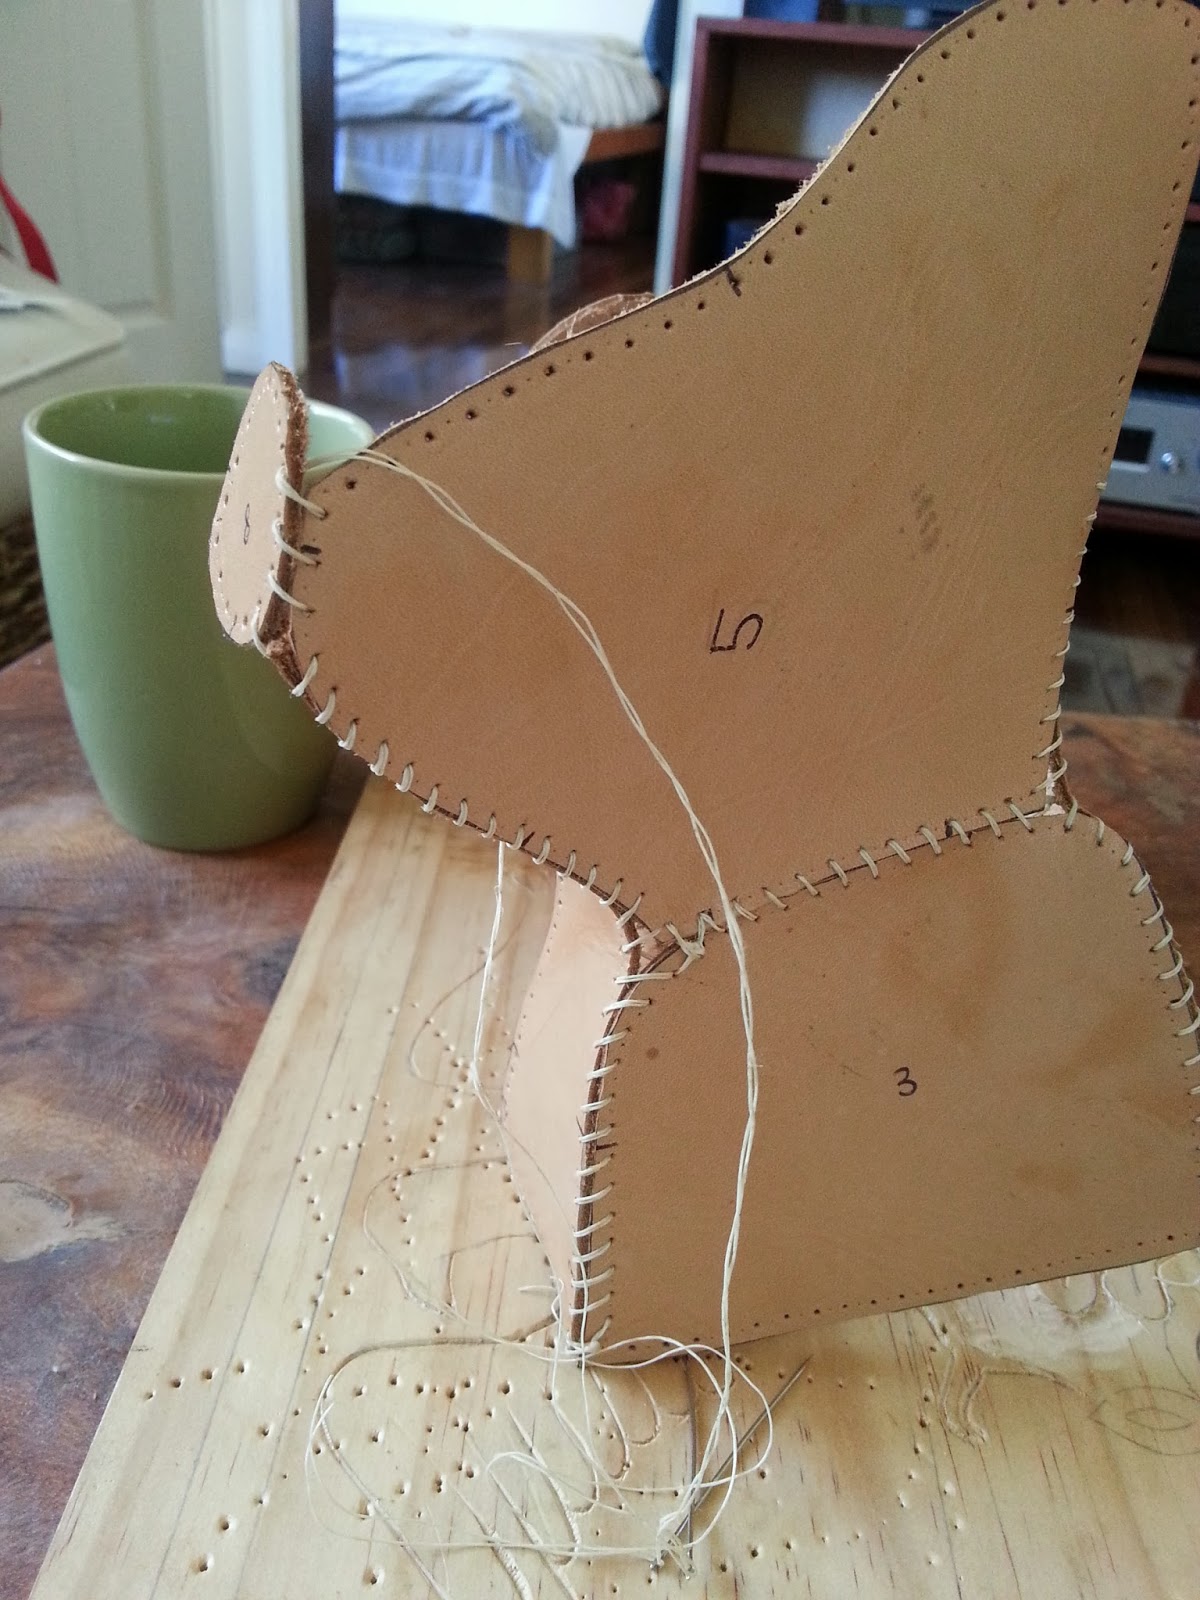
The holes were marked with a rotary tool and every second spot was pierced with an awl. I will stitch through these holes. Again, it is not necessary to make a perfectly neatly stitched item, as all stitching will be covered in plaster. On future items, I would love to refine the process and do fine work at every level. Spacing the stitches out serves another purpose - since the stitching is tensioned and retensioned as each new piece is attached, the looser, longer stitches are more suited to tacking. In fact, short, neat, overlapped seams or saddle stitching would make the assembly process harder.

Starting with the larger pieces, I lined up some of the placement marks and began to sew. The curved needle is helping to secure pieces at the placement marks until I stitch up to that point. Because there are very few corners and straight lines, it is a bit tricky to know how far to curve and sew each piece to the next. For this reason, I had 3 - 4 needles on the go.
First, I joined the front and the pieces from one side. Then I attached the nose and worked back from there.


Once the body was attached right around (in a box), closed as much as possible of the head. At this point, I was working with a hand reaching either through the head or through the base for most stitches. I attached the ears separately and closed the head.


The ears were trimmed to look less like a teddy bear and the sewing was complete on the basic leather structure.The next step will be to stuff them with wet sand and wait until it all dries.

