Showing posts with label plaster of Paris. Show all posts

Sunday, 24 November 2013

Leather Helm Crest: Part 11 Applying Gesso grosso

The leather crest has been sized twice and has dried with a smooth, shiny surface. To make gesso grosso I used equal parts water and plaster. Put the water in a bowl. Mix 1/8th volume of powdered hide glue and 1/4 volume tow into the dry plaster. Then pour the whole lot into the water.
 

Mix the gesso together until it is like firm cream - spreadable but doesn't run. I had to add more plaster than the packet recommends so be ready to adjust until the mixture is the right consistency.

The gesso was applied in lumps with a spoon, at first, and then smoothed more evenly. Work quickly, as it will only spread for a few minutes before starting to catch as it sets.


Pay extra attention to the seams. It is important to make a thick enough layer of gesso over the seams, because it is easy to scrape too thin over a seam while smoothing out.

After smoothing out the gesso, the plaster has probably dried enough to start smoothing and moulding with your hand or a sculpting tool.

Check that there is an even thickness right around. Also check that the base of the crest is still the correct shape to fit on the top of your helm. When my gesso grosso dried, I found that the leather had changed shape and no longer fitted on the helm. While breaking of some plaster off (later in the day) to re-set the base shape, I found that the gesso was a much better thickness on one side than the other. I recommend trying to make the gesso grosso between 5 and 10 mm thick. The top piece is too thin


About 10 minutes after mixing the plaster, it became quite firm. I poured a very small amount of water into the mixing bowl and made some paste, like peanut butter in stiffness. I used this to fill in some low patches, especially around the eyes, so there was enough plaster to sculpt eyelids out of.


The crest stood to dry for a day and then will be covered with gesso sottile.
Monday, 14 October 2013

Sculpting in plaster

I've been trawling Youtube for some sculpting info. However, it is late at night and the sound on my computer is busted, so I have been watching these clips without any volume. I have no idea if the commentary is any good. The visuals tell me what I want to know, so turn your speakers off and enjoy.

Using a butter knife, a chisel and a foam rasp to carve a simple shape from a block of plaster. The last minute is sped up, so skip to here if you like.

How to use various sculpture tools on a large plaster object.
http://www.youtube.com/watch?v=UozFKqGqfNI&list=PL08D841503D1717CE

http://www.youtube.com/watch?v=xiDHbKOoQao&list=PL08D841503D1717CE

http://www.youtube.com/watch?v=uDvNF4LvV9c&list=PL08D841503D1717CE

http://www.youtube.com/watch?v=mDZWyob0jQM&list=PL08D841503D1717CE

http://www.youtube.com/watch?v=Eqqlius3ylU&list=PL08D841503D1717CE

http://www.youtube.com/watch?v=29eT2ndGIKg&list=PL08D841503D1717CE

http://www.youtube.com/watch?v=pvNZlmwmJvQ&list=PL08D841503D1717CE

http://www.youtube.com/watch?v=Ro0Giymu-pA&list=PL08D841503D1717CE


Monday, 30 September 2013

Leather helm crest: Part 6 Preparing gesso sottile


About a week ago, I started to saturate some plaster of Paris to make gesso sottile. This is the second layer of gesso that Cennino Cennini recommends for the outside of a helm crest. In an earlier post I explored the chemical composition of gesso. Gesso sottile is a super hydrated version of plain plaster of Paris. By soaking the plaster, you are allowing it to take on more H2O (water), giving it the desirable property of a slower drying time. This means we will be able to add the final sculpting touches with more care.

Since this is the first time I have used plaster in this way, to sculpt rather than to make moulded objects, it is all a learning experience. I have no idea how well the plaster will stick to the leather, or how well the second layer of plaster will stick to the first, or how the paint will need to be applied. It will also be the first time I have made pigment based medieval paints. There will have to be some test pieces very soon...

Cennini suggests leaving your plaster to soak for 30 days, changing the water to ensure it remains clean. Other sources say this method is inexact - but it is the best evidence I have, closest to my chosen time period, so I have tried this method first. We can always try something else.

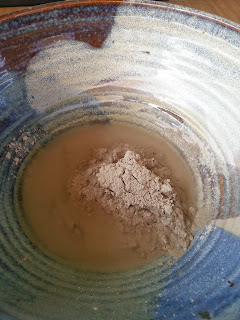
To make gesso sottile, I fill a bucket with water and poured plaster in. It is always recommended that you add plaster to water, not water to plaster. When making a gravy or sauce, this produces lumps but for plaster it works well. I mixed it gently and continued to add plaster until it was not absorbed immediately. I covered the bucket with another tub to stop rain, cats, frogs and leaves getting in. Now, we wait.

Friday, 16 August 2013

Gesso from calcium carbonate vs gesso from calcium sulphate

In my last post, I briefly outlined what gesso was. I am still looking into how it came to be used and why type was chosen over the other. I used the websites listed in the previous post, particularly this e-book, and will refer to it again here.

Calcium Carbonate
Calcium carbonate was typically used in Northern Europe, most likely because this is where significant and accessible deposits were being mined during the middle ages. It is also known as chalk. Chalk is the remains of ancient sea creatures. It can be finely ground and to make chalk whiting. This whiting can be turned into gesso by adding a size.

Calcium Sulphate
Bulian and Graystone say it was typically used around the Mediterranean region, most likely because Bologna and Volterra have large deposits. Jerry Tresser also records that in the 1300s there was a large deposit being mined at Montmartre, near Paris. This most likely accounts for the common name of the refined product: Plaster of Paris.

The mined substance is known as gypsum. This is CaSO4.2H2O [Calcium sulphate dihydrate]

Gypsum was mined, ground up and burned to remove water and any impurities. Tresser says this process also changes the natural gypsum from yellow to white. When this dried product was ground again, it has the adjust chemical composition CaSO4.1/2H2O . It was, and still is, sometimes called Plaster of Paris. This powder is called gesso in Italian.

Gesso was used in 2 ways.
1. Gesso Grosso
CaSO4.1/2H2O + Size
Plaster of Paris, or gesso, was sifted and then moisten it, assumedly with water.

Add parchment size or hide size to this paste to make gesso grosso. This is the first layer Cennini recommends to apply over the leather crest shape. It is fast drying, but this means bulky sculpture protrusions have less time to sag or drip. This makes it a good material for roughing out the shape.

2. Gesso Sottile
CaSO4.2H2O + Size
Plaster of Paris, or gesso, was soaked in water for several weeks
Cennini says to soak it for 30 days. Jerry Tresser points out that this is an imprecise process, as it is not possible to tell when the gesso was been super hydrated. After reading a few other versions of this process, I think Cennini likely chose 30 days as a safe, standard soaking time to ensure the process was completed by this point.

The water is drained off and the paste is set into blocks to dry again. This powder was called gesso di bologna.

Mix it with size to make Gesso Sottile. This is used in the fine finishing layer of Cennini's crest making process. It has the benefit of being slower drying, allowing more time for fine detailing.


What is Gesso , Ground and Size?

Reading Cennini's instructions on making gesso left me confused so I went searching. The best results I found were at Qualitative Study of Cennini's Gesso for Illumination and Wood Coatings: Theory and Practice pp.142-144 The book is available for purchase as a hard copy or e-book. I liked this person's profile and their enthusiasm for the modern version of the process. Here is a summary of my new understanding of the materials and process.

What is a Ground?
When timber or leather are prepared for painting, it is sometimes useful to place a layer of substance that will enhance the surface texture and the appearance of the paint. Gesso is one form of ground. It is a white substance that is painted over the main structure. In the case of crests, Cennini recommends building a structure of moulded leather and applying several layers of gesso as the ground.

What can Gesso be made from?
Sometimes texts simply use the term 'white ground', which is not very specific but is a good umbrella term. The short answer is that there were 2 main substances in use as white grounds, though other less common materials were also suitable.  

Most Common
Whiting    CaCO3 
- This is available at my local Eckersleys art shop

Plaster of Paris   CaSO4.1/2H2O
Derived from calcium sulphate
*Note* There are several versions of the usable product so I will add detail
This is available at all hardware shops and art shops


Less Common
Kaolin         A2O3.2SiO2.2H2O
Essentially, a clay, but with a wide range of uses and preparations
Synonyms 
- This is available at my local Eckersleys art shop.

Dolomite     CaMg(CO3)2
Magnesium Calcium Carbonate
- I have not seen this for sale but have not really gone looking
*Note* The term dolomite seems to be a synonym for Calcium Carbonate, even though the chemical composition is different.

What is Size?
Size is another word for glue - a very simplified description, but it makes sense in most contexts. Rabbit hide glue, or just 'hide glue', is available online from book making and fine woodworking websites. It comes as orange brown crystal flakes. Cennini recommends making the best size from the "necks of goats and sheep by trimming, washing, soaking and then boiling it," (Thompson, 1960, cited in Bulian & Graystone, 2009, p. 143, linked above). I will have a look at Cennini for the exact quote. This book also mentions two other "historic treatises" by Theophilus and Watin. Both have a preference for animal glue but none mention rabbit skin glue (Souza and Derrick, 1995, cited in Bulian & Graystone, 2009, p. 143). This implies that perhaps we use rabbit hide glue for most of our reconstruction projects simply because it is readily available at the moment, rather than it is readily available because of superior properties.