Wednesday, 27 November 2013

Interesting Cennini references

http://www.noteaccess.com/Texts/Cennini/index.htm

Section one
Chapter XVI

 "get a leaf of druggists' glue, not fish glue,"

Chapter XXXI

"When you have got this done, take a little white lead well worked up with gum Arabic."

Section three

"Then, when you want to work, remember first to make this plaster quite uneven and fairly rough."

Section 5

"There is one size which is made of cooked batter, and it is good for parchment workers and masters who make books; and it is good for pasting parchments together, and also for fastening tin to parchment. We sometimes need it for pasting up parchments to make stencils. This size is made as follows. Take a pipkin almost full of clear water; get it quite hot. When it is about to boil, take some well-sifted flour; put it into the pipkin little by little, stirring constantly with a stick or a spoon. Let it boil, and do not get it too thick. Take it out; put it into a porringer. If you want to keep it from going bad, put in some salt; and so use it when you need it"

Section 5

How Goat Glue is Made, and How it is Tempered; And How many Purposes it will Serve.
Chapter CVIIII

"And there is a glue which is known as leaf glue; this is made out of clippings of goats' muzzles, feet, sinews, and many clippings of skins. This glue is made in March or January, during those strong frosts or winds; and it is boiled with clear water until it is reduced to less than a half.[102] Then put it into certain flat dishes, like jelly molds or basins, straining it thoroughly. Let it stand overnight. Then, in the morning, cut it with a knife into slices like bread; put it on a mat to dry in the wind, out of the sunlight; and an ideal glue will result. This glue is used by painters, by saddlers, and by ever so many masters, as I shall show you later on. And it is a good glue for wood, and for many things. We shall discuss it thoroughly, showing what it may be used for, and how, for gessos, for tempering colors, making lutes, tarsias, fastening pieces of wood and foliage ornament together, tempering gessos, doing raised gessos; and it is good for many things."

A Perfect Size for Tempering Gessos for Anconas or Panels.
Chapter CX

"And there is a size which is made of the necks[103] of goat and sheep parchments, and clippings of these parchments; these are washed [p. 67] thoroughly, and put to soak a day before you put them on to boil. Boil it with clear water until the three parts are reduced to one. And when you have no leaf glue, I want you just to use this size for gessoing panels or anconas; for you cannot get any better one anywhere."


A Size Which is Good for Tempering Blues and Other Colors.
Chapter CXI

"And there is a size which is made from the scrapings of goat or sheep parchment. Boil them with clear water until it is reduced to a third.[104] Know that it is a very clear[105] size, which looks like crystal. It is good for tempering dark blues. And apply a coat of this size in any place where you have happened to lay in colors which were not tempered sufficiently, and it will retemper the colors, and reinforce them, so that you may varnish them at will, if they are on panel; and blues on a wall the same way. And it would be good for tempering gessos, too; but it is lean in character, and it ought to be rather fat for any gesso which has to take gilding."

Section 5
To Make a Glue out of Lime and Cheese. 
Chapter C XII
"Ends the Fifth[107] Section of This Book.
There is a glue used by workers in wood; this is made of cheese. After putting it to soak in water, work it over with a little quicklime, using a little board with both hands. Put it between the boards; it joins them and fastens them together well. And let this suffice you for the making of various kinds of glue."


"any sort of work which you have to gesso, using a large soft bristle brush. 
Then let it dry. [p. 69] Next take some of your original strong size, and put two coats over this work with your brush; and always let it dry between one coat and the next; and it will come out perfectly sized."

How You May Gesso with Gesso Sottile Without Having Gessoed with Gesso Grosso First.
Chapter CXVIII

"Furthermore, it is all right to give any small-sized and choice bits of work two or three coats of size, as I told you before; and simply put on as many coats of gesso sottile as you find by experience are needed."
Leather Helm Crest: Part 12 Applying Gesso grosso


Here is what Cennini suggests you do to apply gesso to the leather structure.

1. size it two or three times
Done.

2. mix gesso grosso and lay it on in a thick paste, modelling it to the animal shape needed.
Done.

3."This done, take some gesso grosso ground with size, liquid and flowing, on a brush, and you lay it three or four times over this crest with a brush."
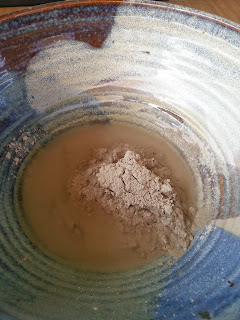
When I had moulded the gesso grosso paste onto the leather, I then mixed water with the remaining paste in the bowl and painted it over the damp gesso. It smoothed out the rougher lumps and filled any splits that had formed while the leather flexed. I was not going for a smooth finish, as I wanted to replicate a scruffy, hairy surface.

4. "Then, when it is quite dry, scrape it and smooth it down, just as you do when you work on panel."
I used some sculpture tools to remove any lumps and smooth the surface a little.

5. "Then, in the same way, as I showed you how to gesso with gesso sottile on panel, in that same way gesso this crest. When it is dry, scrape it and smooth it down;"
I applied a layer of gesso sottile with a brush, but made it pancake batter thickness. I think this is much thicker than was intended. Again, I did this so the plaster would 'catch' as it dried and pull into a textured surface to give more of a look like a wavy, bumpy coat of fur.

To make a smooth item, I would mix new gesso grosso immediately after adding the rough layer, making this second, smaller lot with less dry ingredients in the water. I would apply a thin coat with a brush, let it dry, mix a new batch, apply it etc., until there were three or four layers. I would use a rough cloth to rub down the damp gesso grosso where needed. I would also make my layer of gesso sottile much more aqueous and spend time 'polishing' the dry surface with a cloth on a chock.

http://www.noteaccess.com/Texts/Cennini/index.htm

Sunday, 24 November 2013

Leather Helm Crest: Part 11 Applying Gesso grosso

The leather crest has been sized twice and has dried with a smooth, shiny surface. To make gesso grosso I used equal parts water and plaster. Put the water in a bowl. Mix 1/8th volume of powdered hide glue and 1/4 volume tow into the dry plaster. Then pour the whole lot into the water.
 

Mix the gesso together until it is like firm cream - spreadable but doesn't run. I had to add more plaster than the packet recommends so be ready to adjust until the mixture is the right consistency.

The gesso was applied in lumps with a spoon, at first, and then smoothed more evenly. Work quickly, as it will only spread for a few minutes before starting to catch as it sets.


Pay extra attention to the seams. It is important to make a thick enough layer of gesso over the seams, because it is easy to scrape too thin over a seam while smoothing out.

After smoothing out the gesso, the plaster has probably dried enough to start smoothing and moulding with your hand or a sculpting tool.

Check that there is an even thickness right around. Also check that the base of the crest is still the correct shape to fit on the top of your helm. When my gesso grosso dried, I found that the leather had changed shape and no longer fitted on the helm. While breaking of some plaster off (later in the day) to re-set the base shape, I found that the gesso was a much better thickness on one side than the other. I recommend trying to make the gesso grosso between 5 and 10 mm thick. The top piece is too thin


About 10 minutes after mixing the plaster, it became quite firm. I poured a very small amount of water into the mixing bowl and made some paste, like peanut butter in stiffness. I used this to fill in some low patches, especially around the eyes, so there was enough plaster to sculpt eyelids out of.


The crest stood to dry for a day and then will be covered with gesso sottile.

Monday, 18 November 2013

Leather Helm Crest: Part 10 "...size it..."

After rehydrating the hide glue, it was left for a day. This is how I prepared the crest for gesso by sizing it (painting it with size/glue).

I took the lid off the jar of size and added hot water from the kettle to a pot. I tried to get you a nice pic of the set up but the camera fogged up so my kitchen looks like a 70s family photo. I had intended to bring the water temperature up on the stove but the left over water in the kettle, after pouring enough for a cup of tea, was enough heat to melt the hide glue. The open jar was sat on a small ceramic plate, to act as a trivet and keep direct heat from the base, if the water needed to be heated on the stove.


After 5 minutes or so, the glue had melted.


The leather crest had the dried sand removed from the inside, but each time I moved it there seemed to be more. I will really have to give it another solid shake and brush before the final coat of paint or the sand will find a way to get on the paint and make it look grainy.

 I applied one coat of size and left it to dry for an hour. When I returned, it was touch dry with a gel-like texture. You can see, in the jar, how much size it took for a single coat coverage. If around a 1/3 was used in a coat, and the whole volume took 3 teaspoons of dried hide glue, it took around 1 teaspoon for the first coat.


After an hour the size had reset. This time, placed the open jar of size back in the water bath and turned the stove on to the lowest setting. After a few minutes the glue had started to melt. After 5 minutes, the trivet started to bounce around and the glue began to smell. At this point, it had become a golden honey colour and texture. The glass bottle was still not very hot, as I could pick it up with bare hands.

I applied a second coat of size, making sure to brush in a different direction. You can see the brush strokes at 90 degrees to each other on the snout. Leave the size to dry and then you can cover it in gesso grosso.

Sunday, 17 November 2013

Leather Helm Crest: Part 9 A bowl of tow

I have prepared a bowl of tow to mix into gesso grosso. The rope I used was jute, with a synthetic strand bundle (the dark green bundle of fibres). First, I cut the rope into lengths of around 10cm and then unwound it to remove the synthetic bundle.


I tried cutting the fibres with a knife but found snipping it with shears much easier. I cut the fibres into pieces between 2mm and 10mm long. It took a couple of hours to get this half bowlful.


Leather Helm Crest: Part 8 Tow

In returning to an old question I had asked about tow, Cennini has the following to say on preparing gesso grosso:

'CLXIX How to Model Crests or Helmets.[211]
(
after making the leather base)... Then take some of the regular size for gessoing, and size it two or three times. Then take some gesso grosso ground with size, and mix in some beaten tow, and get it stiff, like a batter; and put on this gesso, and rough it in, giving it any shape of man, or beast, or bird, which you may have to make, getting it as like as you can. This done, take some gesso grosso ground with size, liquid and flowing, on a brush, and you lay it three or four times over this crest with a brush.

1.    "...regular size for gessoing..."   As discussed in an earlier post, rabbit hide glue was not listed as the most common in use during this time period. It is, however, the most readily available form now. I will use it for this project and investigate other alternatives for future projects, to compare results.

2.    "...size it two or three times..." This could mean 'apply hide glue size to the outside of the leather base in two or three coats.' We often apply a coat of glue as a sealer to woodwork or leatherwork projects, to give better coverage of outer coats of paint. This may help to attach the plaster layer.

3.   "...Then take some gesso grosso ground with size..." We are going to use commercially available Plaster of Paris for our gesso grosso base. Since our plaster comes pre-ground in powdered form, rather than in blocks like Cennini had to deal with, we can go right ahead and mix in some powdered hide glue. He does not provide quantities or ratios. The text only implies that the size proportion is smaller than the plaster proportion.

4.   "...and mix in some beaten tow..."   I have found a few relevant descriptions for tow.
"n. Coarse broken flax or hemp fiber prepared for spinning....

...[Middle English, possibly from Old English tow-spinning (in tow-cræftspinning craft, spinning)."
"tow /təʊ/    N
  1. the fibres of hemp, flax, jute, etc, in the scutched state
  2. synthetic fibres preparatory to spinning
Etymology: Old English tōw; related to Old Saxon tou, Old Norse  tuft of wool, Dutch touwen to spin"


"tow

2  [toh]  noun
1.
the fiber of flax, hemp, or jute prepared for spinning by scutching.
2.
the shorter, less desirable flax fibers separated from line fibers in hackling...
...Origin:  1300-1350; Middle English; 
Old English tōw-  (in tōwlīc  pertaining to thread, tōwhūs  spinning house); 
akin to Old Norse   wool


tow

3  [toh] noun Scot.
a rope.
Origin: 1425-1475; Late English (Scots);
Old English toh-  (in tohlīne  towline); cognate with Old Norse tog towline."

This suggests that if I take some rope made from the most common material of 1440, being either flax, hemp or jute, and cut very small fibres up to mix into the plaster, I can use this to "...mix in some beaten tow..." I suppose it would be possible to use unspun flax or jute from another source, too.

This method is supported by the composition of an extant bird crest. This bird is listed as being "...constructed of gesso and coarse fibre, probably jute, over a hardened sculpted leather core..." 
http://www.invaluable.com/auction-lot/cimier-heraldique-pour-grand-heaume-de-tournoi,-40-c-ee0776023c

So, I shall mix some finely chopped jute rope and powdered hide glue into some Plaster of Paris to make gesso grosso, and then paint the thick paste on to the leather form. It finally makes sense!

Leather Helm Crest: Part 7 Mixed hide glue

In preparation for applying gesso sottile over a layer of gesso grosso, I have mixed up some hide glue.

Put 1 part powdered hide glue and 2 parts water into a jar. The picture below shows the water and powder mixed on the left, sitting next to a jar of dry hide glue powder on the right


Let it soak for an hour, to take up the water. 


It becomes much thicker and more rigid, on soaking up the water.
To use this glue, it is recommended that you stir the granules and leave them overnight. Then, you can warm the glue up to a liquid state, using a glue pot or gentle heat in a double boiler. In a sealed jar, this glue can last a couple of weeks, at least. It is water soluble and can be reheated to return it to a liquid state, even when on a project.  
 This is what the rehydrated glue looks like, before being heated to a liquid state. The volume shown is 3 teaspoons of dry size and 6 teaspoons of water. It is the same volume in the picture to the left and the jar on the left in the image above. The expanded size has been stirred and chopped up with the plastic knife shown on the left, making it fluffier. Hence, it appears larger. 

This will be heated and painted on to the leather crest shape in 2 - 3 layers before the gesso layers are added.


Friday, 15 November 2013

Winged helm crest: part 3 equestrian gear

I am planning to make this a heraldic display for use on horseback during demos, school presentations and possibly for use during Skills at Arms games. There are some limitations to work within.

- The helm and armour available to me at this time. The helm very similar to the bulbous faced bascinet shown below.
1410-1418 France

In the second image, below, you can see the difference between the two kinds of bulbous faced helms, both worn at the same time. The helm on the left is like the ones above and is worn with a maile standard or coif. The helms shown on the right, below, are worn with articulated throat and neck plates. This is part of what makes them grand bascinets.
1410-1418 France

As far as armour available, I will be using a set up like this one. Differences: my grieves are not fully cased, I do not yet have sabatons (I like these round toed ones) and I do not have a maile skirt to wear under the faulds of the corizana.
1440-1418 France

Moving on to the horse gear, here are some images that also show the bulbous faced bascinet and related armour used in 1440-1455, in association with horses and helm decoration. Only one of these shows a tournament setting. In that case, though the animal style helm crests are present, at this time they are shown without a torse to cover the join between crest and mantle.

This first image shows a couple of bulbous faced helms. One is worn with full plate, the other with a fabric covering on the chest. Of the open barding, shades of red are shown: bright red x 3, pink x 1, purple x 1. Gold seems to be the most common trim tone and is applied to all parts of the barding. 
1440-1445 France


The image below shows an ornate grand bascinet with 3 feathers rising from the top. The saddle has the same covering as the barding and bridle.
1440-1450 France


A short tailed horse with a pink harness. Note the double girth bands - Useful to avoid slipping while you are swooping over the sea to finish monsters? Perhaps the chest band is not just decorative, but also serves as a simple chest guard to stop back slip.
1450 France

The following is the only image in this time period that I have been able to find the could, potentially show both a suitable helm and equestrian use with animal helm crests. The equipment for the horses is significantly different from other barding shown. This suggests that if animal helm crests were to be used while riding during this later period (1440-50, rather than 1410-20), it would be most appropriate in this format, not open war.
KBR Ms.14697 Tristan und Isolde
1447-1449 Hagenou, France


Bridles
    a                           b                      c                     d                       e                           f
(a) This bridle is the one I would like to replicate. The horses I ride usually do not use bits so the nose band shown is the closest to what we currently use. 
(b) (d) (e) (f) These bridles do not show the nose band to be in use. I cannot see a cheek strap, either, though this may be due to positioning. All of these horses use a bit. 

Chest straps
      
a                          b                       c                            d                     e                     f

Form
(a) (b) single strap with a short hanging strap centre front.
(c) (d) (e) single strap
(f) full covering that works up to leg protection

Decoration
(a) (c) (d) large gold coloured roundels used on joins and regular intervals on strap. 
(b) (d) (e) smaller gold coloured studs and/or rectangular plaques spaced 1 plaque width to 2 spaces.
(f) gold roundels or bells on the lower edge of the chest skirt.

Roundel size
(a) roundel full width of the strap, centred
(b) roundel slightly wider than strap, centred
(c) roundel full width of the strap, on edge, small studs along upper edge of the solid band
(d) roundel width of the fringed part of the strap, which is 4 x wider than the upper band, on centre of the thin upper band. Small studs along the upper band, rectangular plaques on the lower fringed section.
(e) roundel, the full width of the strap including both the upper band and fringed part, seen on join at rear. Small studs along the upper band, rectangular plaques on the lower fringed section.

Rear straps
  a                     b                        c                    d                 e                       f
(f) no rear straps

Horizontal straps
(a) (b) (c) (d) (e) One horizontal strap
(a) (d) clearly show the horizontal strap passing under the tail
Others are not visible. None show the strap passing above the tail

Vertical Straps - hanging
(a) (c) 3 vertical straps under the horizontal strap
(b) 2 vertical straps under the horizontal strap
(e) 1 vertical strap under the horizontal strap

Vertical - Support, above
(b) 2 vertical straps above the horizontal strap
(c) (d) (e) 1 vertical strap above the horizontal strap

Uneven vs Matched
(a) (c) more hanging straps than upper vertical straps
(b) (d) same number of hanging straps as upper vertical straps

Decorations - Roundals
(all) shown roundels on joins in straps
(a) (b) roundels on hanging terminals
(c) (d) no roundel on terminals

Decorations - trim
(a) fine fringe on edge of hanging vertical straps
(b) small gold studs along centre
(c) small gold diagonal bars or crescent studs all along straps
(d) some sort of gold detailing on straps, finer than studs, may be gilding or thread
(e) Small studs along the upper band, rectangular plaques on the lower fringed section.

Reins
a                                b                         c                   d             e                      f
 Width
(a) (b)  narrow along the full length
(c) (d) wide, hanging, seen at nose only
(e) Horse faces right, seen at shoulder, wide on hanging length, narrow where handled
(f) narrow-medium, all straps the same width on bridle, rein and chest

Number
(a) (b) double reins, from bit to handling
(c) (d) (e) (f) single reigns

Points to consider
I need to think about how the open barding will be attached, which saddle it will be used with and how to make sure the straps are attached safely and comfortably. I will need to think about whether I make a bridle from scratch, using a historical or a similar, familiar modern style or if I make a cover for an existing bridle and reins. Righto, I am off to pattern a horse.

Wednesday, 13 November 2013

Extant crests


Here is another extant crest.

Extant bird crest, sans wings


The website lists this crest as sold. I have found items on auction websites before, only to lose the information when the next lot is listed, so I aim to preserve the text here. The website lists...
 "A German heraldic crest for a tournament Great helm, Zimier, in 14th-15th century style. 

Formed as a Swan's head, accurately constructed of gesso and coarse fibre, probably jute, over a hardened sculpted leather core, the base hollowed for fitting the crown of the helmet skull, with pairs of lace-holes at the sides, painted white and heightened in grey, the base and the beak with traces of gilding over a red base coat, and in "aged " condition throughout. 
H. : 37 cm - Wt. : 1095 g"
http://www.invaluable.com/auction-lot/cimier-heraldique-pour-grand-heaume-de-tournoi,-40-c-ee0776023c

Points to note
* The lower edge is gently scalloped.
* There are two lacing points on the lower side. They are spaced at a ratio of 1:2:1 for hole:space:hole. They are a little over one hole diameter above the bottom edge. It would be a reasonable conclusion to expect another pair of holes on the other side.
*Based on the image size and the described height, the holes are around one centimetre in diameter, and the base is near to 22 cm in diameter.
* the lower edge does not appear to have an internal dome/cap.
*The lower edge has a 3.5cm wide band of smooth finish - potentially a thicker leather band to provide rigid support.
* The eyes are sculpted, while the feather detail is entirely painted on.
* The neck, at it's narrowest point, is 6 cm diameter.

I am getting a better idea of how this crest is going to look.

Winged helm crest: Part 2

I spent this evening drawing up copies of the depictions of wings on crests from 1410 to the 1480s. A quick tally of the images I have collected, which is in no way a full collection of every crest illustrated from this time, shows the following trends.

* Single wings were only shown after 1460 and they all run front to back, displaying the wide view from the side of the helm.

* 8 pairs of wings were shown running front to back 1410-1450s
* 2 pairs of wings were shown running front to back 1460s - 1480s

* 4 pairs of wings were shown running left to right 1410-1450s
* 3 pairs of wings were shown running left to right 1460s - 1480s

In both types of positioning, L-R and F-B, both were shown on birds and just as wings rising from a helm.

Monday, 11 November 2013

Winged helm crest: Part 1

For this heraldic display, I will be using green and blue, since they are the colours on my SCA registered device. I will highlight with bronze, to add a metal to the tincture palette.

The complete set will include
* a helm crest suitable for use during equestrian displays and skill at arms competitions
* open barding for the horse that I often ride
* heraldic coloured clothing
* heraldic shield, a christmas gift from my partner
* suitable armour

In choosing the style of crest, I must consider the use, the armour I already have and the materials I have available, matching these aspects to what was present during the middle ages. The helm I have is a bulbous faced bascinet, which will have pointing holes drilled in the top. I think I will make a helm crest in a style suited to the mid 15th century.

I have chosen to use a wing style design, as my device has no primary charge, only two fields.

Wings on Helm Crests
The following images show a timeline of wings in use around the fifteenth century. They are all found at http://lalanguedublason.blogspot.com.au/2012/05/armoriaux-anciens.html

1290 - 1310  Manesse Codex
* Feathers represented on an eagle shaped helm crest, naturalistic irregular edges with lighter paint in Us to simulate feathers on a smooth surface.

1335 - 1345  Die Wappenroll von Zurich
All of these images show designs running front to back, which may be an artistic depiction
* Feathered or fringed horns, making a circular outline, runs front to back
* A peacock feathered disc behind a fleur de lis, soft edges, circular
* Single large wing, very deep feather cuts, one long feather row in first colour, second and third short rows in other colour, lowest fourth short row in first colour, 1:1 feather:gap spacing, gently curved top edge, flap down to the ground
* Single scallop edged fan, running front to back, with peacock designs on ends
* Peacock feather oval rising from a crown
* Single large wing, very deep feather cuts, one row of long feathers and three rows of short feathers
* Single semi circle with a painted design in the middle, two rows of short feathers and one row of peacock feathers
* Trapezium of peacock feathers
* Disc of peacock feathers
* Interesting pair of black and red wings, rising from either side of a hat, naturalistic edges, and elongated shape. Quite a different shape to other wings shown.

1370 - 1386   Armorial du héraut Gelre
* rectangular upright double wings, with multiple naturalistic layers of feathers, run left to right x 2
* stylised claw terminations, one layer
* rectangular double wings with a single row of long feather incisions, run back to front, flat
* rectangular double wings with a single row of short feather incisions, run left to right, flat
* rectangular double wings with a single row of long feather incisions, flat, diagonal edge down by 1/3, runs left to right
* stylised double wing horns, with a curl on the tip and scalloped edging, runs left to right


1410 - 1420  Lalaing Armorial    
* Short double wings on either side of an animal, multiple rows of feathers, narrow wings but feathers widely splayed, flat, run front to back
* Double wings, flapping down to the ground, single feather end layer, curved feathers cut deeply, run front to back x 2
* Double wings, flapping down to the ground, long feather tips with 2 rows of short feathers, curved feathers cut deeply, disc of feathers rising from the centre, run front to back


1445 - 1456  Armorial de Guillaume Revel
* Double wings in rectangular form, slight angle on top edge, two rows of feathers, half length each, flat, only indented feather incisions, run front to back x 2
* Naturalistic wings on a horse or dragon

1447 - 1455   Hyghalmen roll
* Double wing with curved outer edges, deep cut feathers, flat, feathers point upwards, run left to right x 4
* Double wings with bumpy top edge and feathers facing down, more like typical 14th C heraldic wings, deep cut feathers with a 3:1 feather to space ratio, run left to right on a bird

1450  Scheibler Amorial
* Double wings with bumpy top edge and feathers facing down, more like typical heraldic wings, deep cut feathers with a 3:1 feather to space ratio, run left to right on a bird, skinny feathers between wide ones, on a complete bird standing on the helm


1456-1459   Armorial dit de Gorrevod  
* Double wings with multiple feather rows with naturally curved terminations, diagonal end cut down to half,  run front to back
* Rectangular double wings with a long row of feathers and many short rows, straight cut end with no feather incisions - could actually be sheaths of wheat, very flat,  run front to back
* Rectangular double wings with a long row of feathers and many short rows, very short feather incisions, flat,  run front to back


1466 - 1470   Wappenbuch vo St Gallen, Haggenberg     double wings on a woman run left to right, double wings on a bird run front to back in natural position on the bird's body.
* Single wing, flat, wide naturalistic form, back edge cut into curved edge with deep feather incisions, runs front to back
* Double wings on a woman, very curved shape making an oval outline, single row of feather incisions, deep cut, run left to right, facing front, flat
* Double wings on a bird in natural position, long arcing feathers with very deep incisions, flat.
* Double wings, flat, wide naturalistic form, back edge cut into curved edge with deep feather incisions, double wings run front to back from inside a crown


1466 - 1473     Ortenburger  Wappenbuch
* Simplified naturalistic wings on a bird

1483   Conrad Grunenberg Wappenbuch  
*A single wing, hard to tell if running front to back or left to right, deep feather incisions, curved feathers widely spaced, flat x 2
* Double flat wings, hard to tell if running left to right or front to back, one long feather layer and one short feather layer, arcing outline making a circle


1486    


1244 - 1259  Matthew Paris shields


1265 - 1270 Wijnbergen


1272 - 1307  Smalepece's Roll


1285  Charles roll


1310 Lord Marshal


1340 Cook ordinary


1417 - 1420 Cour Armoureuse


1340 - 1350   Balduineum

1350  Powell's roll 

1353  Wappensaal zu Lauf

1449 - 1456    Bergshammar

1466 Trivulziano ou Visconti

1470 - 1480 (+ 1292 - 1295)  Amorial le Breton

1527 

1605   Siemacher's Wappenbuch