Tuesday, 10 June 2014

Leather helm crest: Part 13 Painting and mounting

The crest had a layer of gesso sottile painted on. It would have been possible to add further layers, though I only used 2 layers on this crest. Further layering of thinner gesso would have resulted in a smoother finish. It would also have been possible to scrape and smooth back flaws between layers. Good things to know for next time.

When the gesso had been left to dry for a day, the paint was applied. The paint was mixed using magnesium black and zinc white, added to gum arabic. It was applied by brush, and coats left to dry for around an hour between. Care was taken not to disturb previous layers as wet paint was being applied - wet paint could moisten the under layer.

The mantle was cut from a light silk. The torse was made from the same, with a white silk ribbon attached.

Mounting
The crest was constructed with two holes in each side, and corresponding holes were drilled in the helm. First the mantle was laid in position and the cord passed through. 
Then the cord was tied and the torse lowered over the join.


Wednesday, 27 November 2013

Interesting Cennini references

http://www.noteaccess.com/Texts/Cennini/index.htm

Section one
Chapter XVI

 "get a leaf of druggists' glue, not fish glue,"

Chapter XXXI

"When you have got this done, take a little white lead well worked up with gum Arabic."

Section three

"Then, when you want to work, remember first to make this plaster quite uneven and fairly rough."

Section 5

"There is one size which is made of cooked batter, and it is good for parchment workers and masters who make books; and it is good for pasting parchments together, and also for fastening tin to parchment. We sometimes need it for pasting up parchments to make stencils. This size is made as follows. Take a pipkin almost full of clear water; get it quite hot. When it is about to boil, take some well-sifted flour; put it into the pipkin little by little, stirring constantly with a stick or a spoon. Let it boil, and do not get it too thick. Take it out; put it into a porringer. If you want to keep it from going bad, put in some salt; and so use it when you need it"

Section 5

How Goat Glue is Made, and How it is Tempered; And How many Purposes it will Serve.
Chapter CVIIII

"And there is a glue which is known as leaf glue; this is made out of clippings of goats' muzzles, feet, sinews, and many clippings of skins. This glue is made in March or January, during those strong frosts or winds; and it is boiled with clear water until it is reduced to less than a half.[102] Then put it into certain flat dishes, like jelly molds or basins, straining it thoroughly. Let it stand overnight. Then, in the morning, cut it with a knife into slices like bread; put it on a mat to dry in the wind, out of the sunlight; and an ideal glue will result. This glue is used by painters, by saddlers, and by ever so many masters, as I shall show you later on. And it is a good glue for wood, and for many things. We shall discuss it thoroughly, showing what it may be used for, and how, for gessos, for tempering colors, making lutes, tarsias, fastening pieces of wood and foliage ornament together, tempering gessos, doing raised gessos; and it is good for many things."

A Perfect Size for Tempering Gessos for Anconas or Panels.
Chapter CX

"And there is a size which is made of the necks[103] of goat and sheep parchments, and clippings of these parchments; these are washed [p. 67] thoroughly, and put to soak a day before you put them on to boil. Boil it with clear water until the three parts are reduced to one. And when you have no leaf glue, I want you just to use this size for gessoing panels or anconas; for you cannot get any better one anywhere."


A Size Which is Good for Tempering Blues and Other Colors.
Chapter CXI

"And there is a size which is made from the scrapings of goat or sheep parchment. Boil them with clear water until it is reduced to a third.[104] Know that it is a very clear[105] size, which looks like crystal. It is good for tempering dark blues. And apply a coat of this size in any place where you have happened to lay in colors which were not tempered sufficiently, and it will retemper the colors, and reinforce them, so that you may varnish them at will, if they are on panel; and blues on a wall the same way. And it would be good for tempering gessos, too; but it is lean in character, and it ought to be rather fat for any gesso which has to take gilding."

Section 5
To Make a Glue out of Lime and Cheese. 
Chapter C XII
"Ends the Fifth[107] Section of This Book.
There is a glue used by workers in wood; this is made of cheese. After putting it to soak in water, work it over with a little quicklime, using a little board with both hands. Put it between the boards; it joins them and fastens them together well. And let this suffice you for the making of various kinds of glue."


"any sort of work which you have to gesso, using a large soft bristle brush. 
Then let it dry. [p. 69] Next take some of your original strong size, and put two coats over this work with your brush; and always let it dry between one coat and the next; and it will come out perfectly sized."

How You May Gesso with Gesso Sottile Without Having Gessoed with Gesso Grosso First.
Chapter CXVIII

"Furthermore, it is all right to give any small-sized and choice bits of work two or three coats of size, as I told you before; and simply put on as many coats of gesso sottile as you find by experience are needed."

Leather Helm Crest: Part 12 Applying Gesso grosso


Here is what Cennini suggests you do to apply gesso to the leather structure.

1. size it two or three times
Done.

2. mix gesso grosso and lay it on in a thick paste, modelling it to the animal shape needed.
Done.

3."This done, take some gesso grosso ground with size, liquid and flowing, on a brush, and you lay it three or four times over this crest with a brush."
When I had moulded the gesso grosso paste onto the leather, I then mixed water with the remaining paste in the bowl and painted it over the damp gesso. It smoothed out the rougher lumps and filled any splits that had formed while the leather flexed. I was not going for a smooth finish, as I wanted to replicate a scruffy, hairy surface.

4. "Then, when it is quite dry, scrape it and smooth it down, just as you do when you work on panel."
I used some sculpture tools to remove any lumps and smooth the surface a little.

5. "Then, in the same way, as I showed you how to gesso with gesso sottile on panel, in that same way gesso this crest. When it is dry, scrape it and smooth it down;"
I applied a layer of gesso sottile with a brush, but made it pancake batter thickness. I think this is much thicker than was intended. Again, I did this so the plaster would 'catch' as it dried and pull into a textured surface to give more of a look like a wavy, bumpy coat of fur.

To make a smooth item, I would mix new gesso grosso immediately after adding the rough layer, making this second, smaller lot with less dry ingredients in the water. I would apply a thin coat with a brush, let it dry, mix a new batch, apply it etc., until there were three or four layers. I would use a rough cloth to rub down the damp gesso grosso where needed. I would also make my layer of gesso sottile much more aqueous and spend time 'polishing' the dry surface with a cloth on a chock.

http://www.noteaccess.com/Texts/Cennini/index.htm

Sunday, 24 November 2013

Leather Helm Crest: Part 11 Applying Gesso grosso

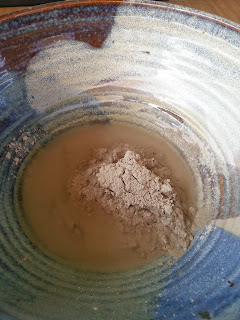
The leather crest has been sized twice and has dried with a smooth, shiny surface. To make gesso grosso I used equal parts water and plaster. Put the water in a bowl. Mix 1/8th volume of powdered hide glue and 1/4 volume tow into the dry plaster. Then pour the whole lot into the water.
 

Mix the gesso together until it is like firm cream - spreadable but doesn't run. I had to add more plaster than the packet recommends so be ready to adjust until the mixture is the right consistency.

The gesso was applied in lumps with a spoon, at first, and then smoothed more evenly. Work quickly, as it will only spread for a few minutes before starting to catch as it sets.


Pay extra attention to the seams. It is important to make a thick enough layer of gesso over the seams, because it is easy to scrape too thin over a seam while smoothing out.

After smoothing out the gesso, the plaster has probably dried enough to start smoothing and moulding with your hand or a sculpting tool.

Check that there is an even thickness right around. Also check that the base of the crest is still the correct shape to fit on the top of your helm. When my gesso grosso dried, I found that the leather had changed shape and no longer fitted on the helm. While breaking of some plaster off (later in the day) to re-set the base shape, I found that the gesso was a much better thickness on one side than the other. I recommend trying to make the gesso grosso between 5 and 10 mm thick. The top piece is too thin


About 10 minutes after mixing the plaster, it became quite firm. I poured a very small amount of water into the mixing bowl and made some paste, like peanut butter in stiffness. I used this to fill in some low patches, especially around the eyes, so there was enough plaster to sculpt eyelids out of.


The crest stood to dry for a day and then will be covered with gesso sottile.

Monday, 18 November 2013

Leather Helm Crest: Part 10 "...size it..."

After rehydrating the hide glue, it was left for a day. This is how I prepared the crest for gesso by sizing it (painting it with size/glue).

I took the lid off the jar of size and added hot water from the kettle to a pot. I tried to get you a nice pic of the set up but the camera fogged up so my kitchen looks like a 70s family photo. I had intended to bring the water temperature up on the stove but the left over water in the kettle, after pouring enough for a cup of tea, was enough heat to melt the hide glue. The open jar was sat on a small ceramic plate, to act as a trivet and keep direct heat from the base, if the water needed to be heated on the stove.


After 5 minutes or so, the glue had melted.


The leather crest had the dried sand removed from the inside, but each time I moved it there seemed to be more. I will really have to give it another solid shake and brush before the final coat of paint or the sand will find a way to get on the paint and make it look grainy.

 I applied one coat of size and left it to dry for an hour. When I returned, it was touch dry with a gel-like texture. You can see, in the jar, how much size it took for a single coat coverage. If around a 1/3 was used in a coat, and the whole volume took 3 teaspoons of dried hide glue, it took around 1 teaspoon for the first coat.


After an hour the size had reset. This time, placed the open jar of size back in the water bath and turned the stove on to the lowest setting. After a few minutes the glue had started to melt. After 5 minutes, the trivet started to bounce around and the glue began to smell. At this point, it had become a golden honey colour and texture. The glass bottle was still not very hot, as I could pick it up with bare hands.

I applied a second coat of size, making sure to brush in a different direction. You can see the brush strokes at 90 degrees to each other on the snout. Leave the size to dry and then you can cover it in gesso grosso.

Sunday, 17 November 2013

Leather Helm Crest: Part 9 A bowl of tow

I have prepared a bowl of tow to mix into gesso grosso. The rope I used was jute, with a synthetic strand bundle (the dark green bundle of fibres). First, I cut the rope into lengths of around 10cm and then unwound it to remove the synthetic bundle.


I tried cutting the fibres with a knife but found snipping it with shears much easier. I cut the fibres into pieces between 2mm and 10mm long. It took a couple of hours to get this half bowlful.


Leather Helm Crest: Part 8 Tow

In returning to an old question I had asked about tow, Cennini has the following to say on preparing gesso grosso:

'CLXIX How to Model Crests or Helmets.[211]
(
after making the leather base)... Then take some of the regular size for gessoing, and size it two or three times. Then take some gesso grosso ground with size, and mix in some beaten tow, and get it stiff, like a batter; and put on this gesso, and rough it in, giving it any shape of man, or beast, or bird, which you may have to make, getting it as like as you can. This done, take some gesso grosso ground with size, liquid and flowing, on a brush, and you lay it three or four times over this crest with a brush.

1.    "...regular size for gessoing..."   As discussed in an earlier post, rabbit hide glue was not listed as the most common in use during this time period. It is, however, the most readily available form now. I will use it for this project and investigate other alternatives for future projects, to compare results.

2.    "...size it two or three times..." This could mean 'apply hide glue size to the outside of the leather base in two or three coats.' We often apply a coat of glue as a sealer to woodwork or leatherwork projects, to give better coverage of outer coats of paint. This may help to attach the plaster layer.

3.   "...Then take some gesso grosso ground with size..." We are going to use commercially available Plaster of Paris for our gesso grosso base. Since our plaster comes pre-ground in powdered form, rather than in blocks like Cennini had to deal with, we can go right ahead and mix in some powdered hide glue. He does not provide quantities or ratios. The text only implies that the size proportion is smaller than the plaster proportion.

4.   "...and mix in some beaten tow..."   I have found a few relevant descriptions for tow.
"n. Coarse broken flax or hemp fiber prepared for spinning....

...[Middle English, possibly from Old English tow-spinning (in tow-cræftspinning craft, spinning)."
"tow /təʊ/    N
  1. the fibres of hemp, flax, jute, etc, in the scutched state
  2. synthetic fibres preparatory to spinning
Etymology: Old English tōw; related to Old Saxon tou, Old Norse  tuft of wool, Dutch touwen to spin"


"tow

2  [toh]  noun
1.
the fiber of flax, hemp, or jute prepared for spinning by scutching.
2.
the shorter, less desirable flax fibers separated from line fibers in hackling...
...Origin:  1300-1350; Middle English; 
Old English tōw-  (in tōwlīc  pertaining to thread, tōwhūs  spinning house); 
akin to Old Norse   wool


tow

3  [toh] noun Scot.
a rope.
Origin: 1425-1475; Late English (Scots);
Old English toh-  (in tohlīne  towline); cognate with Old Norse tog towline."

This suggests that if I take some rope made from the most common material of 1440, being either flax, hemp or jute, and cut very small fibres up to mix into the plaster, I can use this to "...mix in some beaten tow..." I suppose it would be possible to use unspun flax or jute from another source, too.

This method is supported by the composition of an extant bird crest. This bird is listed as being "...constructed of gesso and coarse fibre, probably jute, over a hardened sculpted leather core..." 
http://www.invaluable.com/auction-lot/cimier-heraldique-pour-grand-heaume-de-tournoi,-40-c-ee0776023c

So, I shall mix some finely chopped jute rope and powdered hide glue into some Plaster of Paris to make gesso grosso, and then paint the thick paste on to the leather form. It finally makes sense!